Cherry blossom nail art

Beauty, cherry blossom, Nail art, nail polish, Reviews, Swatches
Some time ago I received some nail mail from my dear friend +bubica vucko.
If you have some time, please give her blog a visit and/or enter her lovely give-away.
Today I’m showing you this gorgeous polish by Classics.
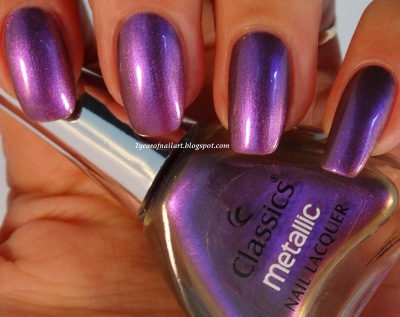
Classics Metallic nail lacquer 10.
In the bottle it looks like a duo chrome shifting from purple to bronze/gold.
In real life it’s more of a multi chrome but very hard to describe.
Main color in daylight would be a purple with beautiful metallic shimmers that shifts to a bronze in the shade and a bright blue-toned purple with direct lighting.
+bubica vucko you sure know what I love ♥
Application is easy and 2-3 coats gives a perfect coverage.

Swatches

Picture taken in light box, no flash.
Picture taken in light box, with flash.
Picture taken in light box, no flash.

Nail art

This gorgeous polish screamed for a delicate nail art.
Inspired by a white blossoming tree, I came up with this design.
Thank you +bubica vucko!
You’re the best ♥

Swatches Catrice Million Styles Effect Top Coat & multichrome rhinestones by Born Pretty Store

Beauty, Nail art, nail polish, Reviews, Swatches
Catrice recently came out with a new series of Million Styles Effect Top Coats.
The effect top coats all have a clear base filled with colored glass flecks.
 
From left to right:
01 Godfather of Pearl 
Godfather of Pearl is a mix of purple and pink glass flecks.
Although the pink glass flecks are visible, main color is purple.
02 ¿Holo, Que Tal?
¿Holo, Que Tal? is a mix of yellow and orange/pink glass flecks. This is the only one from this collection that has a very visible duchrome shift in any light source.
03 Have an Ice Day
Have an Ice Day is a mix of yellow/green glass flecks. Main color is a bit more green than the yellow color from ¿Holo, Que Tal?
04 Return of Space Cowboys
Return of Space Cowboys is a mix of blue and blurpe glass flecks. Main color is blue.
 
Of course these effect top coats can be applied over any color nail polish and/or on the natural nails.
I however, prefer lacquers like these applied over black.
‘Single nail’ swatches show 1 coat of effect top coats applied over 2 coats of China Glaze Liquid Leather (black).
I have a glossy and a matte version for you.

Swatches glossy

Picture taken in light box without flash
Picture taken in light box with flash

Swatches matte

Picture taken in light box without flash
Picture taken in light box with flash

Review

I can be short.
If you love glass fleck lacquers, these are wonderful for you.
Only note I can give is that they apply like a jelly (a bit syrupy, but workable).
I can imagine this will be harder to apply over time, as it will probably get more and more thick.

Nail art

Today’s nail arts feature another product that I received from Born Pretty Store.
Nail art wheel containing 200 pieces of heart, circle and marquise multichrome rhinestone nail decorations.
Of course I could go for a plain look by placing these rhinestones on top of my swatches but that wouldn’t be me, as I like to add some personal touch.
I thought of another nail art design that I was still dying to try out.
I wanted to do some sugar spun black strings topped with different colors of metallic transfer foils.
And this was the result:
I have to say that the total look was stunning but perhaps a little too much????
So I’ve made another design but this time a bit more calm…or so I thought 😀
Making silver holo area’s in which I placed the rhinestones.
If you want to order some goodies from Born Pretty Store.
You can use my code to get 10% off of your order:
HUB10

Fall make-up look and nail look ft. products by Born Pretty Store

autumn, Beauty, fall, makeup, Nail art, nail polish, Reviews, Swatches
After receiving many compliments on my Halloween look, I got inspired and decided to make another nail-face look.
This time with a fall theme.
Now, up front, I almost never wear make-up in my daily life.
Trying to get the kids ready for school is my No.1 priority, which leaves me with almost no time to even think about make-up.
On a good day I apply some foundation and a mascara 😀
However, I do love make-up and my laptop is full with make-up inspirations/tutorials etc.
My make-up stash isn’t bad either, if I may say so 😉
I’ve received some goodies from Born Pretty Store for reviewing and after creating the nail look, I also used these products for my face look.
So, let’s get started 😀
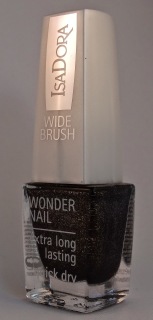
I really wanted to show a new nail polish brand (Swedish) that I’ve discovered around here; IsaDora.
Here are some swatches of 791 Autumn leaves.
Picture taken in light box without flash
Picture taken in light box with flash
Autumn leaves is actually a wine color with goldish shimmer (micro glitter),
Almost opaque with 1 coat, which shows more of the purple color.
With 2 coats it leans to a brown. Pictures show 2 thin coats.
The flash picture suggests that there might be some multi colored and/or holo micro glitters too.
And believe me, this is a true beauty as soon as it hits light/sun.
Not disappointed at all (except for the price maybe €11,50/$14,39).
We still had some sunny days here in Holland and I felt this was the last chance to try one of my holo topcoats.
I applied 1 coat of 12-12-2012 by Big City Nails (which is a Dutch Indie Brand).
Then I used one of the products that I’ve received from Born Pretty Store;
I’m not going through the whole process of how to apply water decals (if you are new to them, you can have a look at previous posts by me about water decals).
They were easy to use.
One note: They look best on a lighter background.
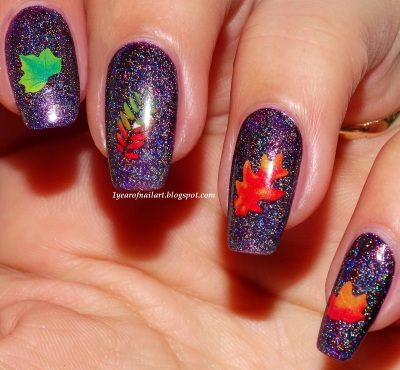
Above shows 1 coat of IsaDora 791 Autumn leaves, topped with 1 coat of Big City Nails 12-12-2012 (holo topcoat) and water decals by Born Pretty Store
The holo topcoat looks scattered on the picture but I actually saw a pretty linear holo in real life.
As I felt the darker background really didn’t do the water decal justice, I also made a nail look with a lighter background.
Base color used: Catrice Limited Edition Crème Fresh C01 The Peach Boys.
Which look do you prefer?
On the accent nail you can see the other product that I’ve received from Born Pretty Store:
As you can see the leaf also has a little hole.
With a small jump ring it could work perfect as a nail piercing jewel or even as a charm on a bracelet/necklace.
Now, for the face look you’ll all be waiting for (of course ;-P)
Picture shows my hand with the first nail art in this post.
I’ve used the water decals on my cheek and some gold foil on the other one.
Around my hair line I’ve applied some decor fall leaves with hair wax.
I’ve used the 3D golden leave as a headlace.
Hope you like the look!

Swatches, review and nail art Essence Trend Edition Rock Out!!

Beauty, Nail art, nail polish, Reviews, Swatches
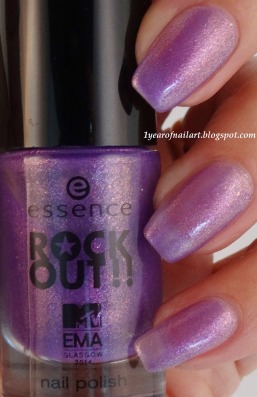
Things are going to get musical in october and november 2014 with the new Essence trend edition “Rock Out!!
Essence is once again an official sponsor of the MTV European Music Awards (EMA).
Glasgow is ready to welcome the who’s who of the international music scene on the 9th of november and fans can look forward to a breathtaking show.
It’s showtime…with Essence!
This trend edition features 4 lacquers and a glow-in-the-dark topcoat.
From left to right:
01 Best rock
02 Best hip-hop
03 Best pop
04 Best female
01 Biggest fan (glow-in-the-dark)

Swatches

01 Best rock
Picture taken in light box without flash
Picture taken outside without flash
01 Best rock is a very sheer grey/silver jelly that contains green and pink micro flakies (glass flecks).
Building it up to opaqueness is dreadful.
I’ve used 2 thicker coats for the swatches above and noticed that a third or fourth wouldn’t make a huge difference and decided to leave it at two.
This polish is probably best used as a topcoat IMAO.
02 Best hip-hop
 
Picture taken in light box without flash
Picture taken outside without flash
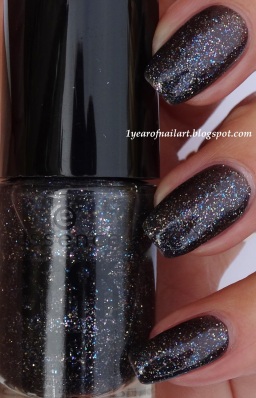
02 Best hip-hop is a sheer black that contains multi colored and holoraphic micro glitter.
Too sheer for my taste.
Pictures above show 3 coats but in the future I would probably layer this over a black,
03 Best pop
Picture taken in light box without flash
Picture taken outside without flash
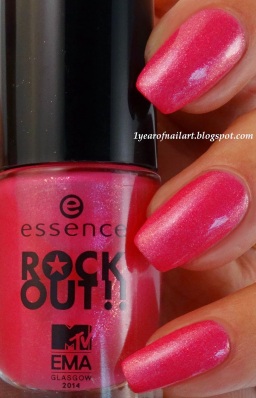
03 Best pop is a pink crelly containing gold and pink micro flakies (glass flecks).
This polish shows a lot more pigment than the others and therefore was beautifully opaque with two thin coats.
04 Best female
Picture taken in light box without flash
Picture taken outside without flash
04 Best female is a very sheer purple jelly containing silver and pink/purple micro flakies (glass flecks).
Again best to use as a topcoat.
Pictures above show 2 thicker coats but 3 or 4 won’t make a huge difference.
01 Biggest fan
Bottle shot in the dark
MTV EMA nail art in the dark
01 Biggest fan is a glow in the dark topcoat.
In the light the polish is like a milky jelly containing holographic star glitters.
The amount of star glitters is good and fishing and placement is at the users taste but not required much.
Good glow…picture however is taken after charging it with a bright light.
Black light gives an immediate strong glow.
01 Best Rock, 04 Best female and 03 Best pop layered over black
As I mentioned these polishes are all kind of sheer and I really wanted to know what they would look like layered over a black.
The pink (03 Best pop) was almost too opaque so I did a very very thin coat.

Review

The lacquers are all very sheer…too sheer for my taste.
I’m also not a huge fan of the jelly like consistency.
Drying time of the first coat is okay but as your building it up, it takes more and more time.
And with at least 3/4/5 coats…I simply don’t have the time!!
Layering them over other colors is the perfect solution, especially over black is really something I love.
The glow in the dark topcoat is better than the previous one by Essence.
Consistency is easier to work with, the glow is better and I also like the addition of those cute holographic stars as it spices up the ‘day’ look.
I was pleasantly surprised by the glass flecks, they are more subtle than glitters in my opinion and I love the color shifts that they give.
Personal favorites: 03 Best pop and 01 Biggest fan (glow in the dark topper)

Nail art

What else can I do as taking this edition as my inspiration?!
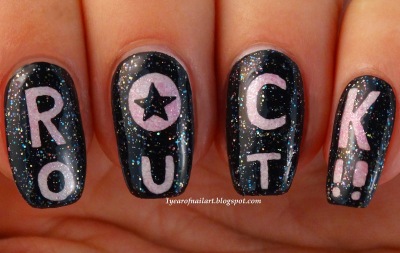
I chose to use the bottle print as my design.
I started with a white base.
After this I randomly sponged 01 Best rock, 03 Best pop and 04 Best female over the white base.
Then I used black acrylic paint to cover the nails, leaving the letters out and showing the white sponged background.
I finished by covering the black acrylic paint with 02 Best hip-hop.
The thumb design is the same as the glow in the dark nail art from above but then in daylight 😀

Madam Glam Soak Off UV Gel #75 Magenta

Beauty, gel polish, Nail art, nail polish, Reviews, soak off gel polish, Swatches
Today I have something new to show you!
Laura from Madam Glam asked me if I wanted to do a review on a UV Gel Polish by Madam Glam.
Always up for new things, so here it is.
Madam Glam, based in New York, is sold exclusively online.
Besides their regular nail polish, nail care and nail art products, they recently launched a Soak Off UV Gel line that will last 3 to 4 weeks!!!
Here is the package I received:
Inside:

Tutorial

For those who can’t or don’t want to look at the video, here is a step-by-step:
Step 1: Materials
Get your materials together:
– Base Gel
– Gel Polish
– Top Gel
– Remover/Acetone
– Something to clean cuticles; brush/remover pen/orange wood stick
– Cotton pads
– UV lamp/LED lamp
– Gel cleanser (additional)
Step 2: Preparation
Make sure your nails are clean.
I simply used a cotton pad with Acetone.
I didn’t push back cuticles or anything like that, but it is an option.
Step 3: Apply Base Gel and cure under lamp
You can work nail by nail, but I chose to do 4 nails at once and the thumb nail separate.
I applied a thin coat of Base Gel.
Make sure your cuticles stay clean.
Then I cured it under the UV lamp:
UV: 2 min.
LED: 30 sec.
Step 4: Apply Gel Polish and cure under lamp
The Gel Polish looked kind of syrupy and hard to work with.
Surprisingly on top of the Base Gel it applied like heaven.
I used one coat of Gel Polish.
Again, make sure your cuticles stay clean.
Cure under lamp:
UV: 2 min.
LED: 30 sec.
Step 5: Apply Top Gel and cure under lamp
I already have some gel top coats that I’ve tried out before and in these cases I really had to make sure that I’ve used a very thin coat. Otherwise the finished look got wrinkled.
I applied this Top Gel with thin and thicker coats and it wasn’t a problem at all.
During application you might see some small bubbles but another brush stroke can get this away.
My tip: Keep on brushing (without taking more Top Gel) till you get a perfect smooth surface.
Don’t forget the free edge for longer durability!
Then cure under the lamp:
UV: 2 min.
LED: 30 sec.
Step 6: Additional???
A few minutes (10) after curing the Top Gel, the finished nails were still wet/sticky to touch; leaving my finger print.
I’m not sure if it is the result of the sticky product that Gels can leave, too short time of curing or simply that I have to wait longer before touching.
However I used a cotton pad soaked with Gel Cleanser (Essence) and the surface was smooth again and dry to touch.
So I can really recommend using a Gel cleanser as finishing step!!

Review

Application: Application was very easy (did you notice I even did this with my non-dominant hand).
Color: The magenta color is very vibrant. I can also describe it as a darker hot pink.
Finish: Glossy. And according to the amount of layers and it being gel polishes, still very thin.
Note: Use a gel cleanser after last cure to get rid of the stickyness.
Durability: I can’t tell yet but will let you know!
I did remove my nail art with Acetone and it didn’t effect the Gel Polish underneath.
Soak Off: Can’t tell yet but again will let you know over time.
Final verdict: Believing that this will stay on for 3-4 weeks and if you’re looking for a product like that, with great color, and easy to apply. I can definitely recommend these products by Madam Glam!

You can get 30% off using my link
Or use coupon code: YGEL30OFF

Nail art

I admit: I’m terrible at making art with my non-dominant hand.
I used a zipper bag on which I put a layer of topcoat.
Then I free handed some small fall designs using acrylic paint.
After drying time I removed the topcoat with designs from the zipper bag and placed them on the nail, sealing it with topcoat.
That’s it for today!
You can find Madam Glam on:

Swatches, review & nail art Catrice limited edition Check & Tweed

Beauty, Nail art, nail polish, Reviews, Swatches
Today I bring you Catrice limited edition Check & Tweed.
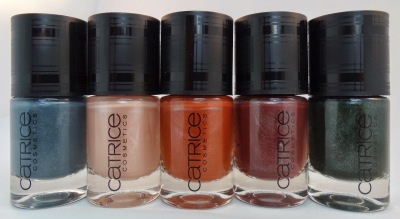
From left to right:
C01 London Calling
C02 England’s Rose
C03 Mind The Red!
C04 Brit Chick
C05 Hyde In The Park
 
Catrice: “Style Check. These colours with ultimate coverage are the ideal companions in the autumn season and an absolute must for stylish nails. Modern hunting green and grey-blue meet upon classic rusty red, camel and soft rosé – all with a pearly finish. The extra-broad reservoir brush captures just the right amount of polish needed for one nail and offers perfect results without streaks.”

Swatches

Pictures are all taken outside without flash.
It showed the colors most truly but there are some irritating reflections/shadows in the pictures…try to not see them please  ;-P
C01 London Calling
 
London Calling is a grey-blue that could work great for jeans mani’s.
C02 England’s Rose
England’s Rose would be the soft rosé color. For me it’s a soft salmon color or a pinkish nude.
C03 Mind The Red!
Mind The Red! is a brown/red. I’m not sure if Catrice is describing this polish as being the rusty red or the camel color,
For me this color looks like the color of red brick.
C04 Brit Chick
Brit Chick is a dark brown with red and a bit of purple undertones.
It reminds me of grapes.
C05 Hyde In The Park
Hyde In The Park is a forest dark green.

Review

Application:
Let’s start with the worst and most frustrating part of this collection: the brush.
It’s indeed extra-broad but the shape of the brush doesn’t make apllication easy.
This is not new for Catrice. The brushes have been like this for a while now but I still can’t get used to it.
Coverage:
Let’s say that the coverage totally makes up for the poor brush.
These were all one coaters!
Or two thin coats as you please.
Colors:
Nothing really special.
The colors are prefect for fall!
My personal favorites are C01 London Calling and C05 Hyde In The Park.
Finish/effect:
Catrice is talking about a pearly finish.
For me it’s more a silver/metal shimmer.
Pearly is sweet. Metal is more rough and this is more rough IMAO.
The shimmer however is very subtle and with some lacquers more noticeable than with others.
Finish is not textured but not 100% smooth and glossy either.
All swatches are without topcoat but I do recommend the use of it as it makes the colors more vivid and shows the shimmer better.
Verdict:
Beautiful fall colors but for me it doesn’t have the “WOW-factor”.

Nail art

I had a beautiful tweed pattern in mind fo my nail art.
But after several attempts, I was done with it.
I ended up with something simular but not totally as I had imagined.
It’s all free hand and with the use of the lacquers from this collection.

Leesha’s lacquer Halloween Collection (2014)

Beauty, Nail art, nail polish, Reviews, Swatches
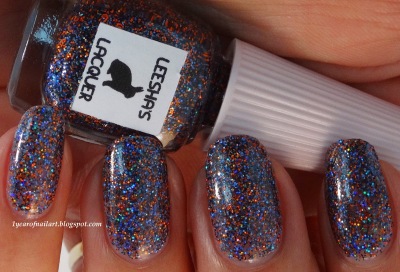
Today I bring you the limited Halloween collection by +Leeshas Lacquer.
Alicia (Leesha), who got really addicted to mixing up her own lacquers, decided to take her passion to the next level and opened her own Etsy shop August 2013.
Leesha’s Lacquer is 5-free, cruelty free, and Vegan friendly!
I was planning to give each lacquer a single post but as the collection is already available,
I decided to give you all the scaryness right away ;-D
So be prepared for a heavy post.
The limited Halloween collection features 4 lacquers.
From left to right:
Halloween collection is available from October 1st – November 30th 2014.

Goosebumps

Goosebumps is named for it’s microfine goose-bump looking glitter.
This clear base is loaded with black, orange and purple micro holo glitter.
Coats suggested: 3-4 for full opaqueness.
Application was easy.
Pictures of swatches show 3 coats and topcoat.
Picture taken in light box no flash
Picture taken in light box with flash
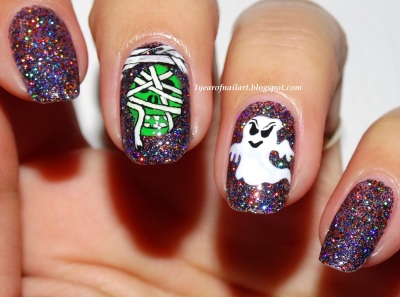
For the nail art I decided to go for some creatures that give us goosebumps 😀
A green mummy monster and a creepy ghost.
Picture taken in light box with flash

What is this, skull-duggery?!

What is this, skull-duggery?! is inspired by the term skullduggery, which refers to the “tricks” portion, rather than the “treat” of Halloween.
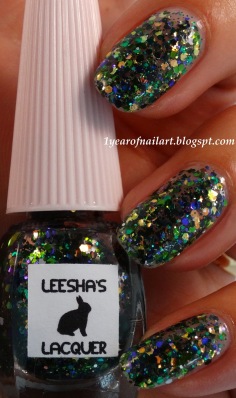
This lacquer has a crelly base (leaning to a very light minty green, perhaps due to the neon green micro glitter). It contains black and neon green micro glitter, big black hexes and orange shards.
Coats suggested: 2-3
Application was easy.
Pictures of swatches show 2-3 coats and topcoat.
Picture in light box no flash.
Picture taken in light box with flash
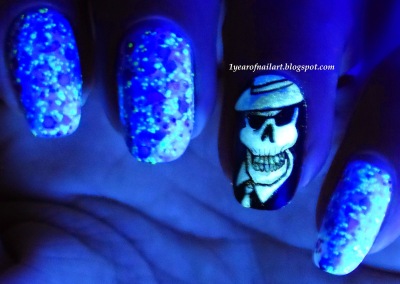
Now of course I was triggered to try this under black light.
Wouldn’t this be great for that Halloween party with black light ;-D
As inspiration for my nail art I’ve used this image:
Meet Skullduggery Pleasant, main character of the Skullduggery Pleasant novels by Derek Landy.
Picture taken in black light

Thank, Mr. Skeltal

Thank, Mr. Skeltal is inspired by Trumpet Skelton of the Abyss.
Granting good bones and calcium to all who Thank, Mr. Skeltal
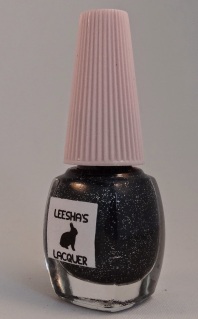
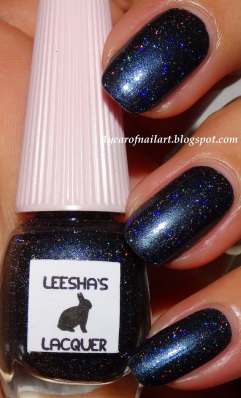
Thank, Mr. Skeltal is a black scattered holo, with sprinkles of good bones and calcium throughout 😀
Coats suggested: 1-2
Application was a bit tricky. On the thick side and really, really fast drying. I had no trouble to make it work as a topcoat smoothed everything out, but I did mention it to Alicia and she makes sure the future lacquers will be less thick.
Pictures of swatches show 1-2 coats and topcoat.
Picture taken in light box no flash
Picture taken in light box with flash
Picture taken outside in the sun
For the nail art I’ve used this image of a trumpet skeleton:
Picture taken outside in the sun

Creepy Cauldron

Creepy Cauldron is inspired by two words that truly define Halloween; Creepy and Cauldron.
Who doesn’t think of witches and skull-duggery and tricks and treats and all that good stuff?!
Creepy Cauldron is a clear base filled with various sizes and colors of purple and green glitters, as well as iridescent orange color shifting glitter.
Coats suggested: 3-4 for full opaqueness but this would make a great 1 coat topper!
Application was like other heavy glitter lacquers; it requires some placement on the nail.
My first thought with this lacquer was: “peacock”.
The colors are a perfect match.
Swatches show 3-4 coats and topcoat
Picture taken in light box no flash
For the nail art I really wanted to show the lacquer more as a topper.
I’ve painted a creepy cauldron spilling Creepy Cauldron potion!

Thank you!

Thank you for reading this heavy post.
Now grab your creepy self and have a look at Leesha’s Lacquer Etsy shop.
Prices are low and buy any 2 Halloween polishes and receive a FREE cabochon bracelet!!!
Find Alicia on:

Jior Couture Collab Collection #AsYourIndieMakerICommandYou (part 6)

Beauty, Nail art, nail polish, Reviews, Swatches
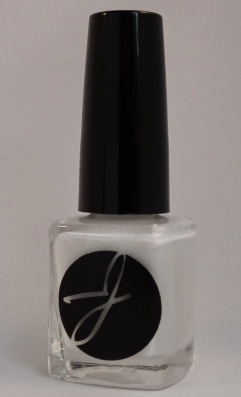
Part 6 already, which means I’m going to show you the sixth lacquer from the +Jior Couture limited collab collection called #AsYourIndieMakerICommandYou.
This very limited collection, which is inspired by HBO show True Blood, is available in store on September 27th.
For additional info about the collection and other lacquers, please visit part 1, part 2, part 3, part 4 and part 5.
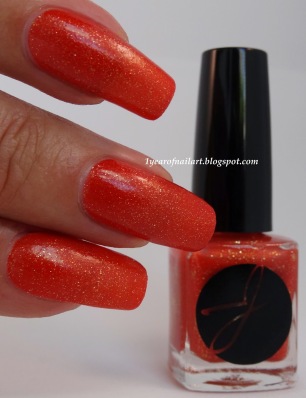
Today I bring you Bon Temps Rousses.
Tribute to all the Bon Temps redheads (gingers); Jessica, Arlene, Lisa & Ginger (True Blood).
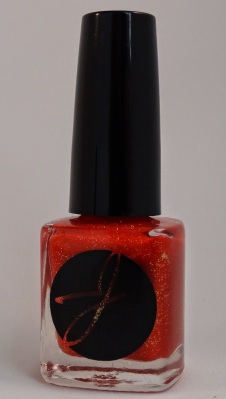
Bon Temps Rousses has a deep orange base filled with gold micro glitter, making it a very rich color and perfect for Fall.
Coats suggested: 2
Finish: Semi matte.
Pictures of swatches show 2 coats and no topcoat.
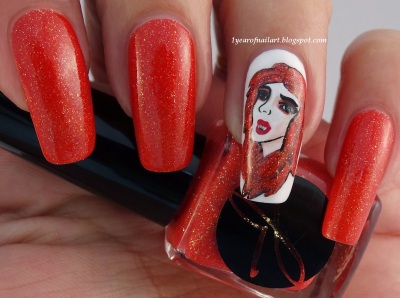
Picture of nail art shows 2 coats with topcoat.

Swatches

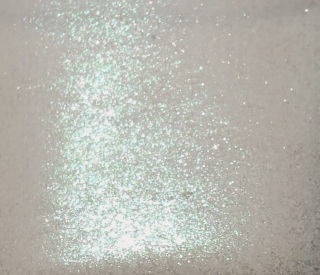
Macro shot.
Picture taken in light box with flash.
Picture taken outside. Natural lighting and no flash.
Picture taken in light box. No flash.

Nail art

The polish name inspired me to paint a redhead.
I’m not the best in painting portraits so this was a big challenge.
I decided to go for a random redhead vampire as I didn’t actually want to paint a redhead from the series.
I made the design with acrylic paints and used Bon Temps Rousses to color her hair.
Hope you like it!

Jior Couture Collab Collection #AsYourIndieMakerICommandYou (part 5)

Beauty, Nail art, nail polish, Reviews, Swatches
Hi lovely readers.
Only 3 lacquers left to show you from the #AsYourIndieMakerICommandYou limited collab collection by +Jior Couture.
Available in store on September 27th.
If you missed previous posts with more info about the collection and the other lacquers.
Just visit part 1, part 2, part 3 and part 4.
Next sentences are 18+
Part 5 is all about Danger Whore.
True Blood quote:
Sookie: “There’s a town consensus about what kind of girl I am…they call me a danger whore.”
 
 
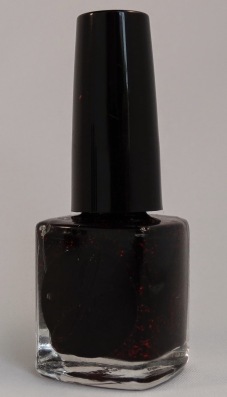
Danger Whore has a black base filled with bright red micro glitter.
It’s like wearing scattered rubies on your nails.
Coats suggested: 2-3
Finish: Textured due to the large amount of micro glitter.
Topcoating it, gives a smooth finish and enhances the brightness of the micro glitter.
Swatch shows 2-3 coats without topcoat.
Nail art shows 2-3 coats with topcoat.

Swatches

Macro shot.
Like I said: bright as rubies and a large amount of micro glitter.
Picture taken in light box. No flash.
As you may have noticed, I only have one swatch for you.
This because different lighting didn’t change the color nor look of the polish.
Personally I love the topcoated version (nail art) best.

Nail art

The following image was the inspiration for my nail art.
Accent nail shows a free hand design using acrylic paint.